BCX Users and Computers
Users and Computers is used to manage users and stations and their organisational structures.
Contents
- 1 Creating an Organisational Unit
- 2 Creating a User Template
- 3 Adding a new user onto network
- 4 Importing multiple users
- 5 Quick find and resetting user passwords
- 6 Editing user details
- 7 Renaming existing users
- 8 Multiple user changes
- 9 Moving users
- 10 Validate Shares and Permissions
- 11 Adding groups
- 12 Converting multiple groups
- 13 Viewing details for a station
- 14 Importing multiple stations
- 15 Disk Quotas
Creating an Organisational Unit
An Organisational Unit is a container in which you can store computer or user objects.
To Create an OU find that location in Users and Computers that you want to place a new OU, click 'Add New' and then 'Organisational Unit'. For example a new intake of students would be created under the Students OU.
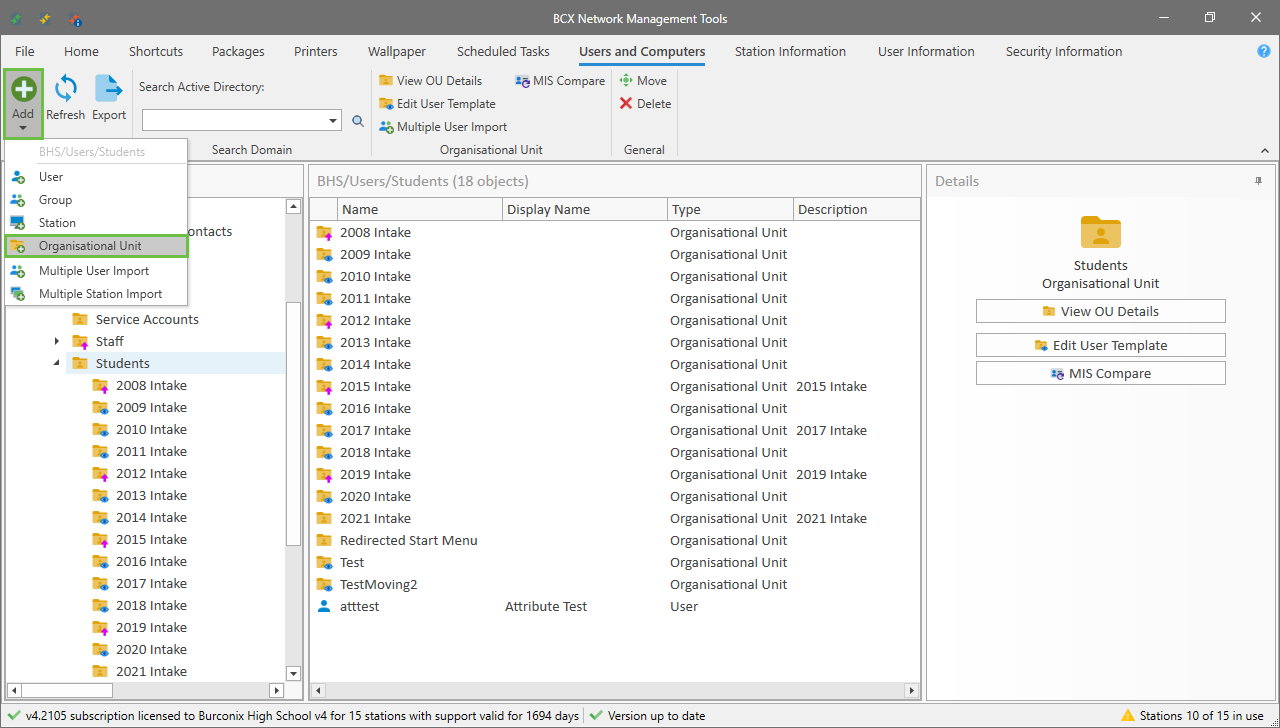 Image showing users and computers tab with add new ou
You will then see the OU Details window where you can enter the name of the OU and a description.
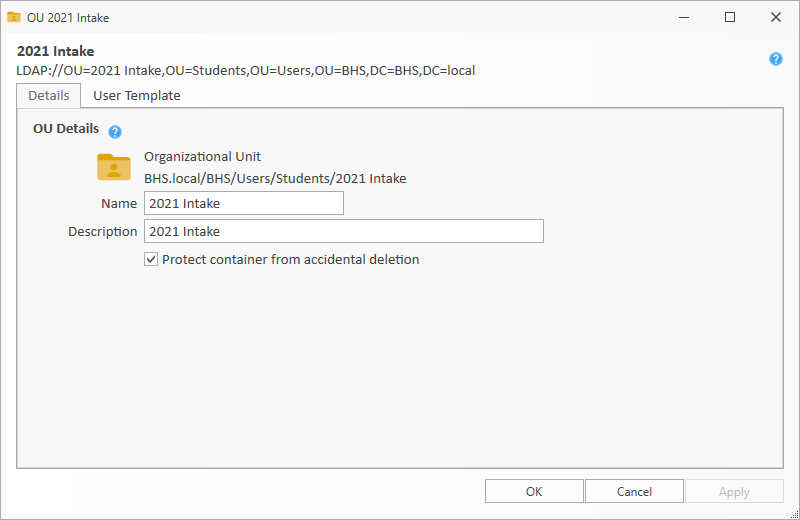 Image showing new ou details window
The 'Protect container from accidental deletion' when checked prevents accidental deletion of the OU and all of the objects contained within. To disable it, you have to go into the properties of the OU by right clicking it and un-ticking the box before trying again to delete it.
Once created, the User Template tab is where you create a template that governs the way that all users under the OU are created.
Creating a User Template
A User Template is a set of rules that you apply to an Organisational Unit. The rule govern the way a user is created when you create them in that location. Rules can set the way the username is formatted, where their home directory is and how it is mapped, their logon scripts, where their mailbox will exist, what groups they are part of and many other properties such as password requirements.
To create a user template, go to the Users and Computers tab. Find the folder where you are going to create new users. Right click the folder and click the 'Edit User Template' option.
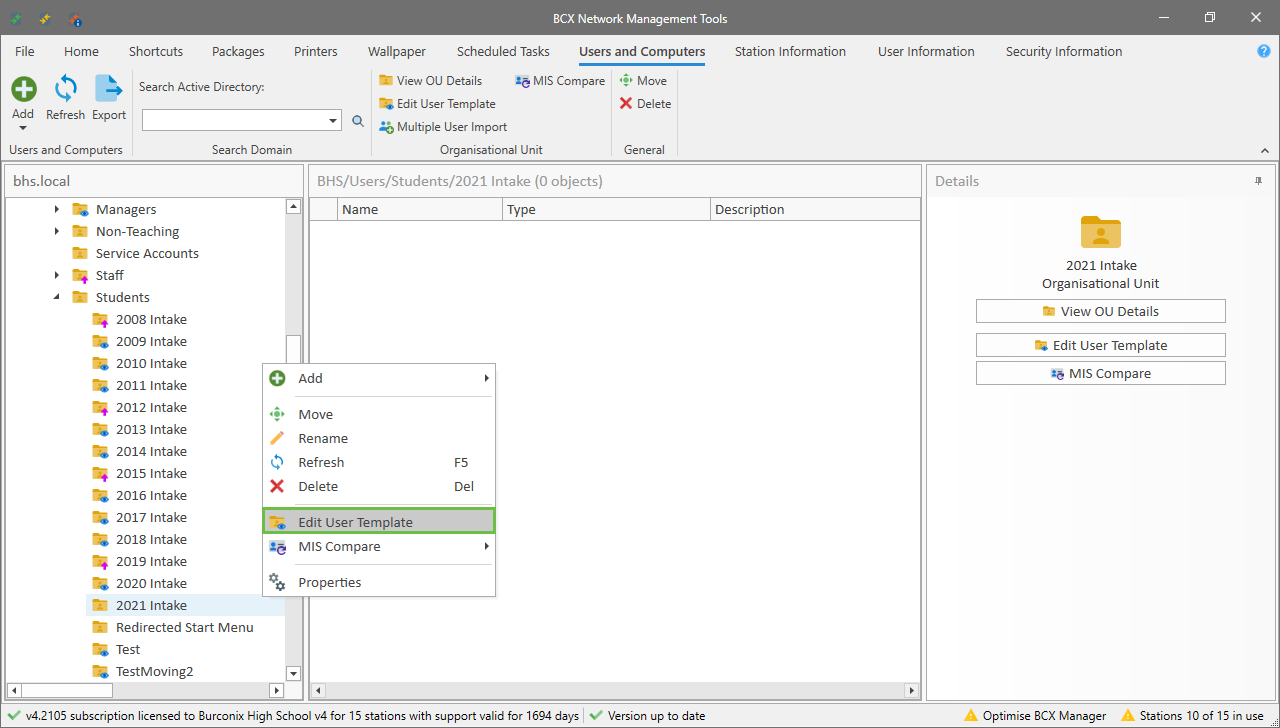 Image showing users and computers tab with right click edit user template
This will give you the edit template window
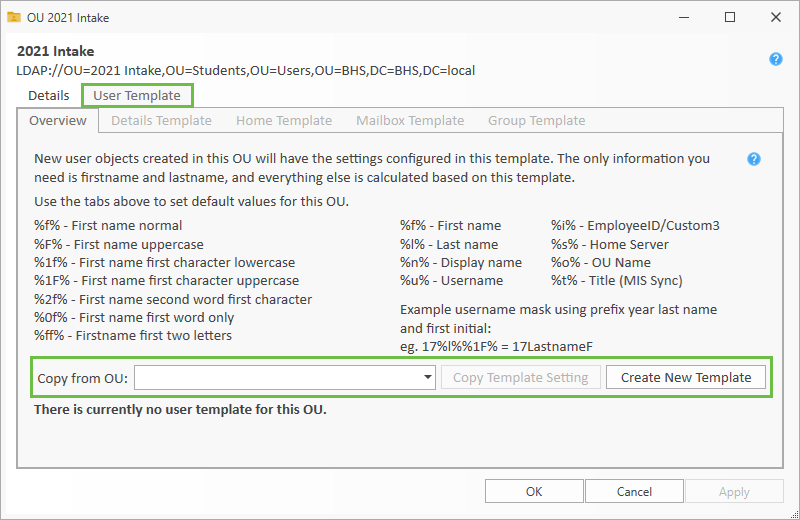 Image showing OU details User Template Overview
You will get options here to either copy an existing template, or 'Create New Template'
The masks that are shown are ways to format a username in the User Details Template tab. Here are some examples applied to Joe Bloggs: %f%%l% :- joeBloggs %F%%l% :- JoeBloggs %l%%1f% :- Bloggsj %l%%1F% :- BloggsJ %l%%ff% :- BloggsJo
User details are set on the first page. All details need to be generic here, you are not yet creating the user. Wild-cards are used the specify how to format the the display name and username. If you have more than one UPN suffix for your domain you can set that here too.
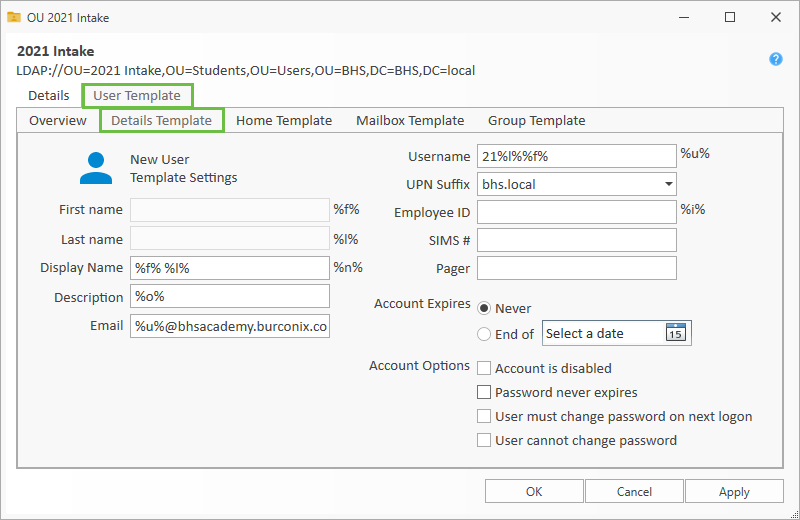 Image showing OU details User Details tab
An example of a username is 11%l%%f%. This would create a user with the prefix of 11 followed by their surname and forename. So a firstname of Joe and surename of Bloggs would give a username of 11BloggsJoe
The account options with the check boxes will be set as default for all new users.
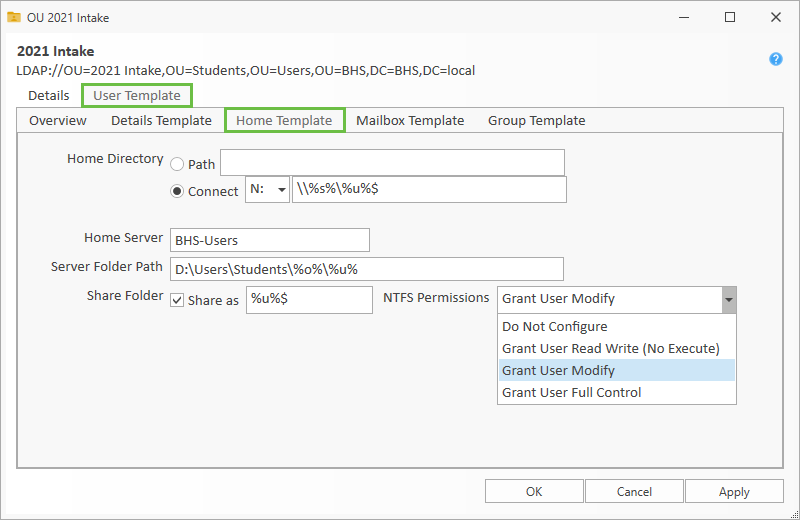 Image showing OU details Home Dir Template tab
On this page you can set which drive letter to assign for a homedrive and where the folder will be shared from. The name of server where the user data is stored should be entered, then the physical path to the folder where it exists on the server. You can also choose the NTFS permissions from a pre-set list, the default being Grant User Modify.
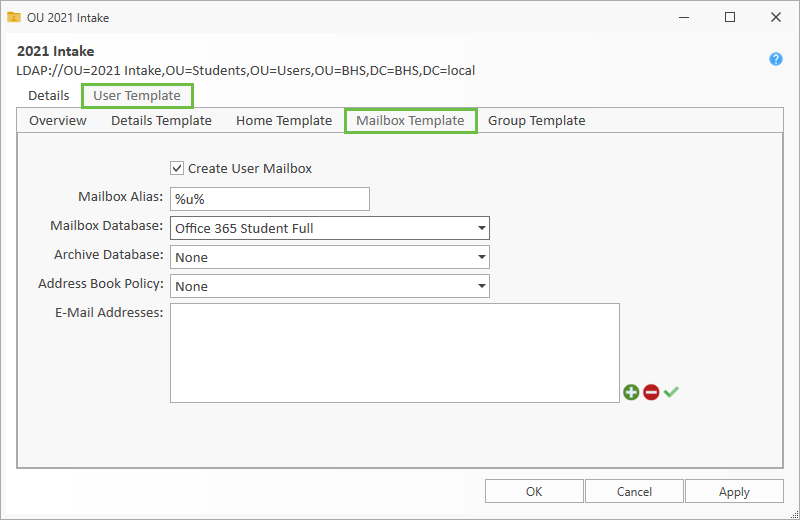 Image showing OU details Mailbox Template tab
You can set mailbox settings on this next tab. It requires that the BCX Exchange connector be setup and that you have an onsite exchange server or 365 Exchange Online. You would select the most appropriate mailbox database for the user.
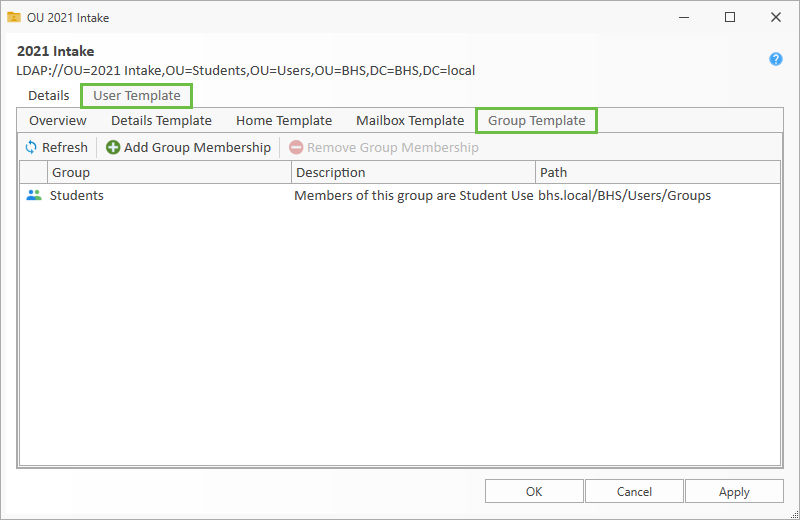 Image showing OU details Group Template tab
Here you can add users to groups by default when they are created. You just click 'Add Group Membership' button and select the groups that are appropriate.
Adding a new user onto network
Find the location that you want to create your new user. Click 'Add New' at the top and click 'User'
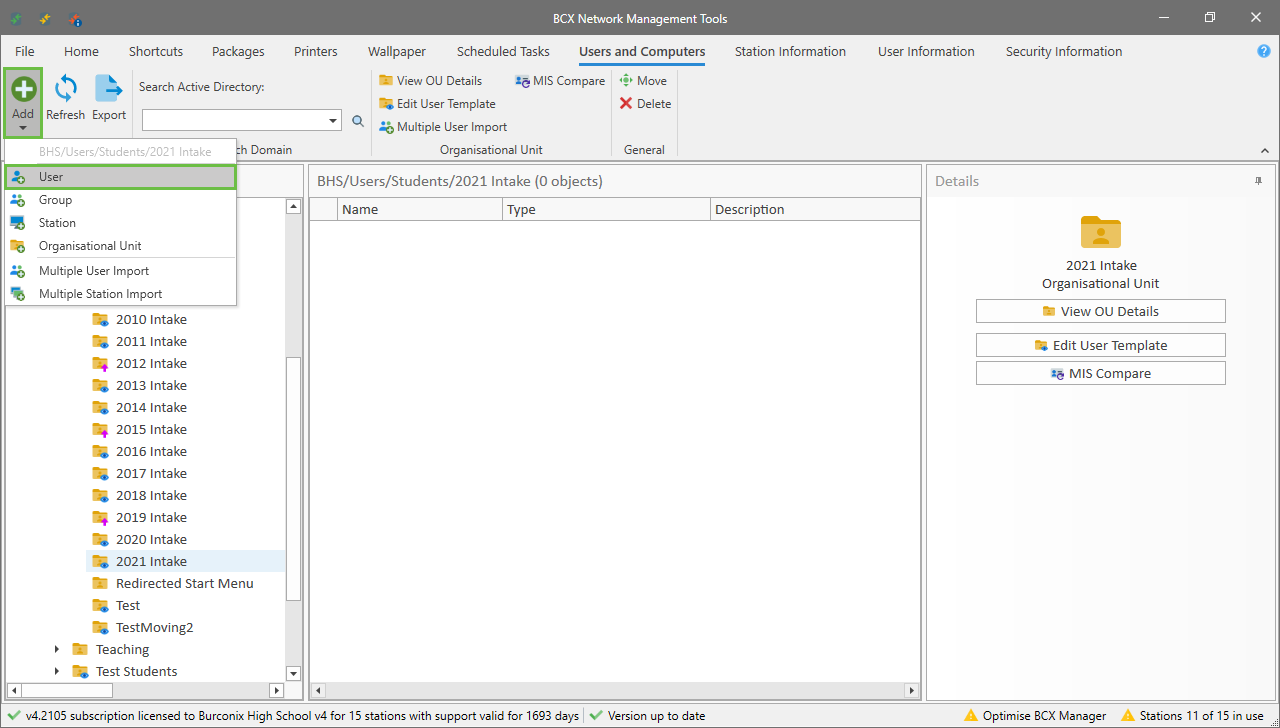 Image showing U&C Tab Add New User
You will see this window
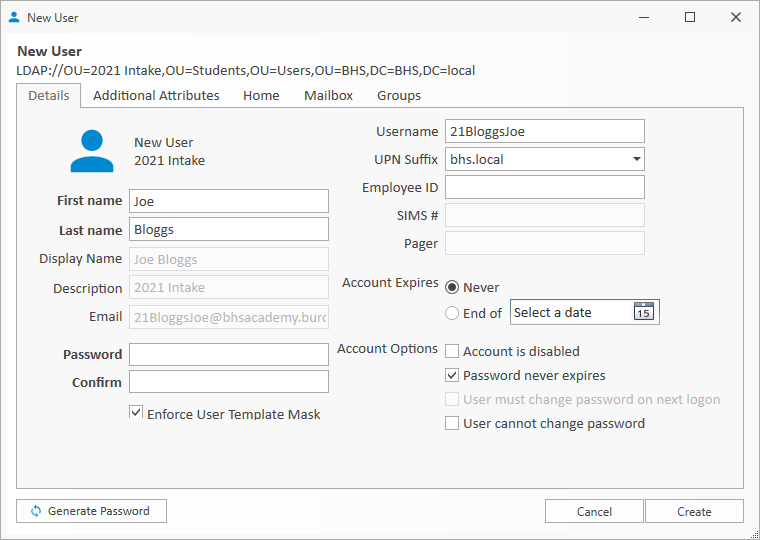 Image showing New User window
Populate the first name and last name, and the rest of the user details will be populated as per the template. You can override the template settings by un-ticking the 'Enforce User Template Mask' Other settings can be overridden in the other tabs as per the user template.
Importing multiple users
You can import multiple users at the same time easily. Just click 'Add New' on the ribbon and click 'Multiple User Import'
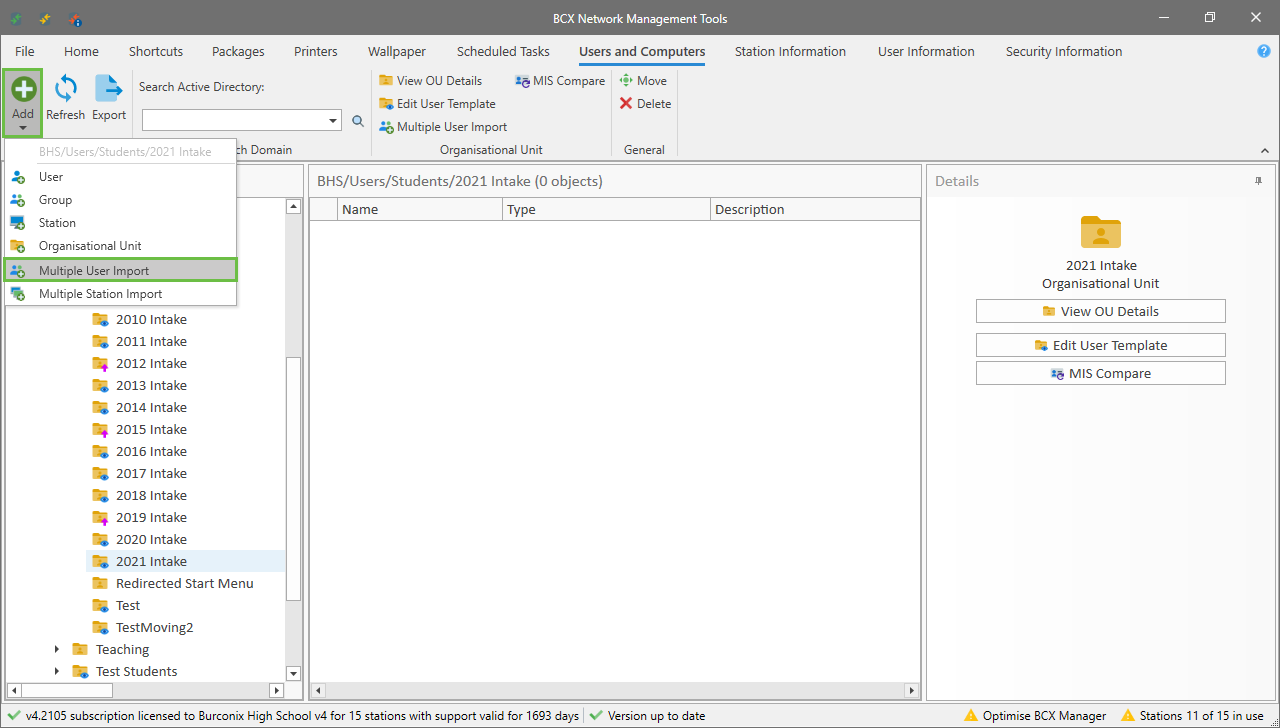 Image showing U&C Tab Add Multiple User Import
You will then see this window
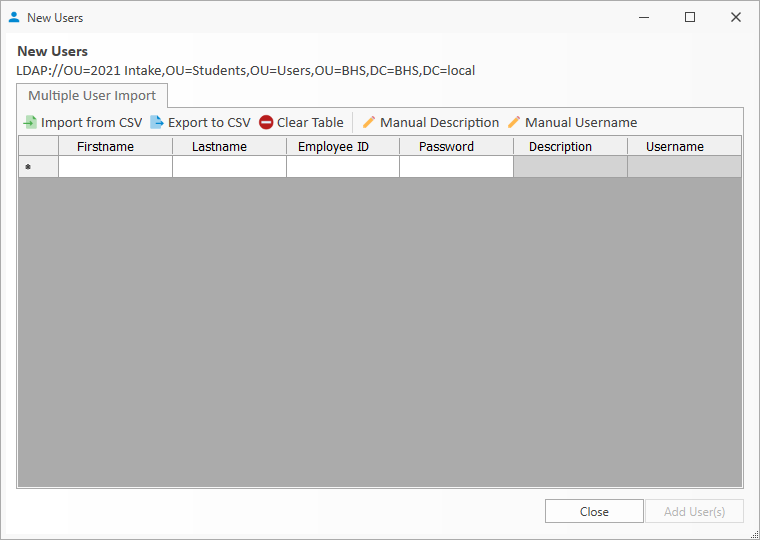 Image showing Multiple User Import window
You can either type in the names yourself manually and let it generate the username automatically, or import them from a CSV. Override the automatic description and username by pressing the appropriate buttons. If the last 2 columns are the CSV are populated with data, the import wizard will see this and ask you if you want to override them. There is no way to override other settings from the template mask from this window. You would have to change the template to suit. If any duplicates or errors are detected, you will be given a chance to go back and correct them and retry the import again.
Quick find and resetting user passwords
Editing user details
Renaming existing users
Multiple user changes
Moving users
Adding groups
Converting multiple groups
Viewing details for a station
Importing multiple stations
Disk Quotas
Return to Contents page