BCX Shortcut Management
Shortcuts are used to provide access to software on your network for your users.
You can control where these are displayed:
- On the Desktop .
- Within the Start Menu.
- Run automatically at logon.
There is full support for x86 and x64 shortcuts within one task and the correct one will automatically be chosen, making software shortcuts a breeze to deploy.
Shortcuts are also compatible with both Classic Shell and Open Shell products.
Contents
Deploying a Shortcut
This guide will take you through creating a new shortcut, controlling how it will be displayed, and assigning it to Users and Computers.
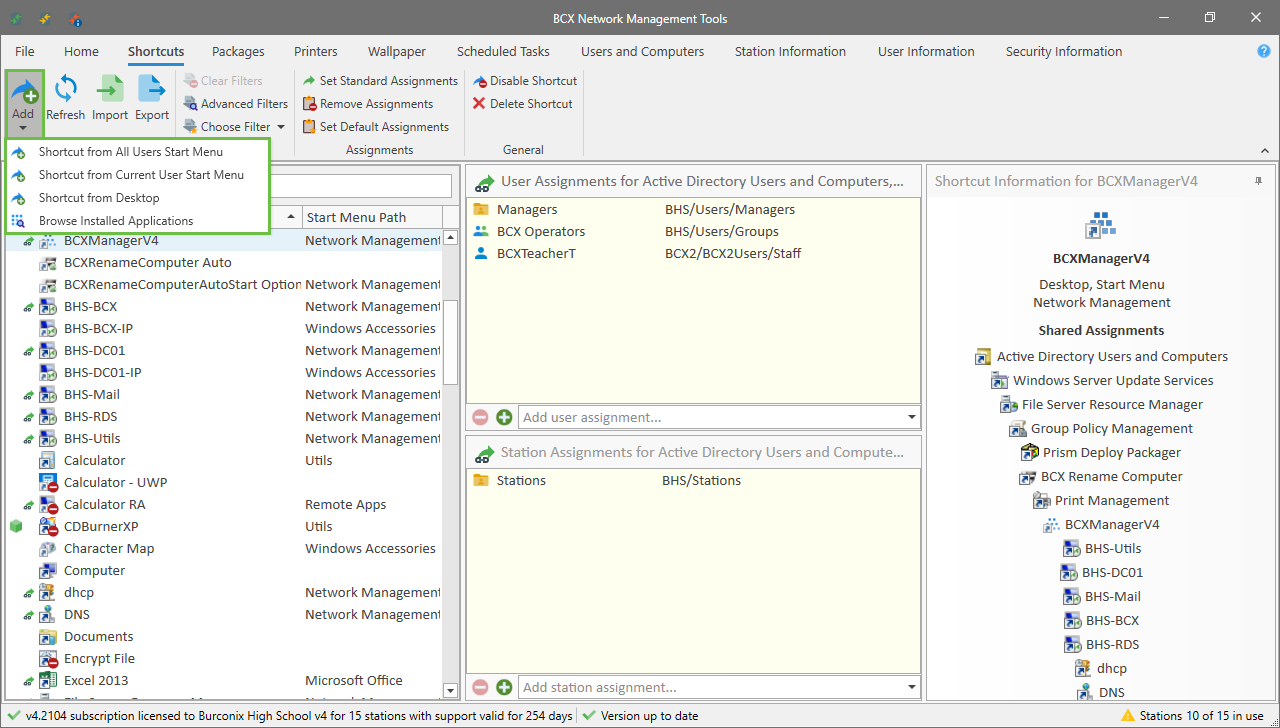
From the Shortcut Management tab, click Add on the ribbon menu, and browse to your existing shortcut in the shortcut import window.
Alternatively you can drag your shortcut or executable directly onto the shortcut management list pane.
You can now choose how you want the shortcut to be displayed for your users.
Select to either deploy this shortcut to the Start Menu, Desktop, or both.
If you are deploying to the Start Menu you can leave the entry blank for the root of the start menu, choose an existing Start Menu Path from the drop down menu, or type a new path directly into the box to create your own.
The shortcut name is how the shortcut will be labeled in BCX Manager. The shortcut description is how the shortcut will be labelled in the Start Menu or Desktop.
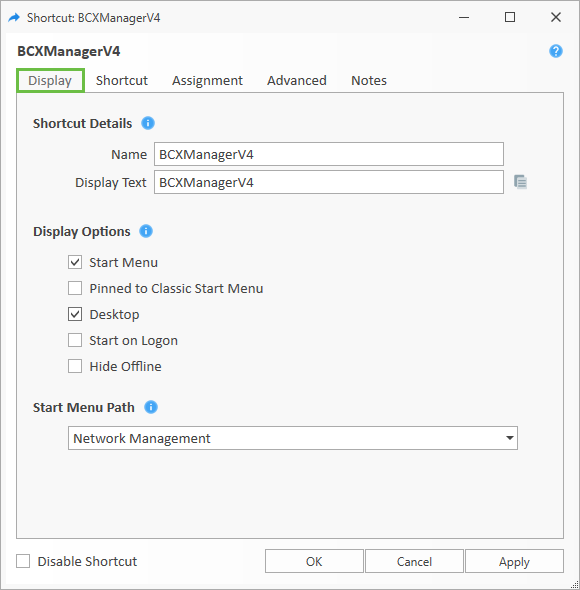
Other options include:
Pinned to Start Menu will pin the shortcuts to the start menu.(Also compatible with OpenShell).
Pinned to Task Bar will pin the shortcuts to the task bar.
If you have issues with pins not displaying correctly after changes, run "C:\Program Files\BCX\Client\BCXClientSimulate.exe" resetpins ui, which will remove all current pins and then replace.
Start on Logon means the shortcut will be autostarted on user logon.
Hide offline does not populate the shortcut if the station cannot see the BCX Server.
You now have a basic shortcut ready for deployment.
To complete the deployment you need to assign the task as seen in an Overview of Assignments and Exceptions
Read on for further ways to customise your shortcut deployment
Shortcut Properties
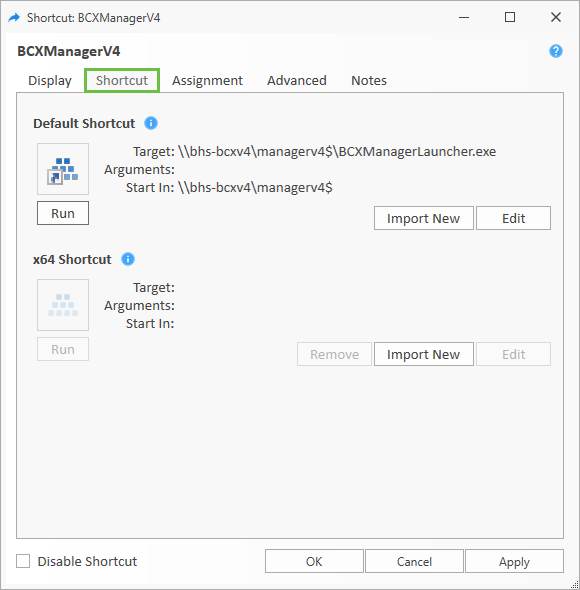
Shortcut Properties displays the details of the shortcut you have created.
The default shortcut will usually deploy correctly to both x64 and x86 architectures, with an option to add a specific x64 shortcut if required.
From here you can also replace, edit, or even run the shortcut.
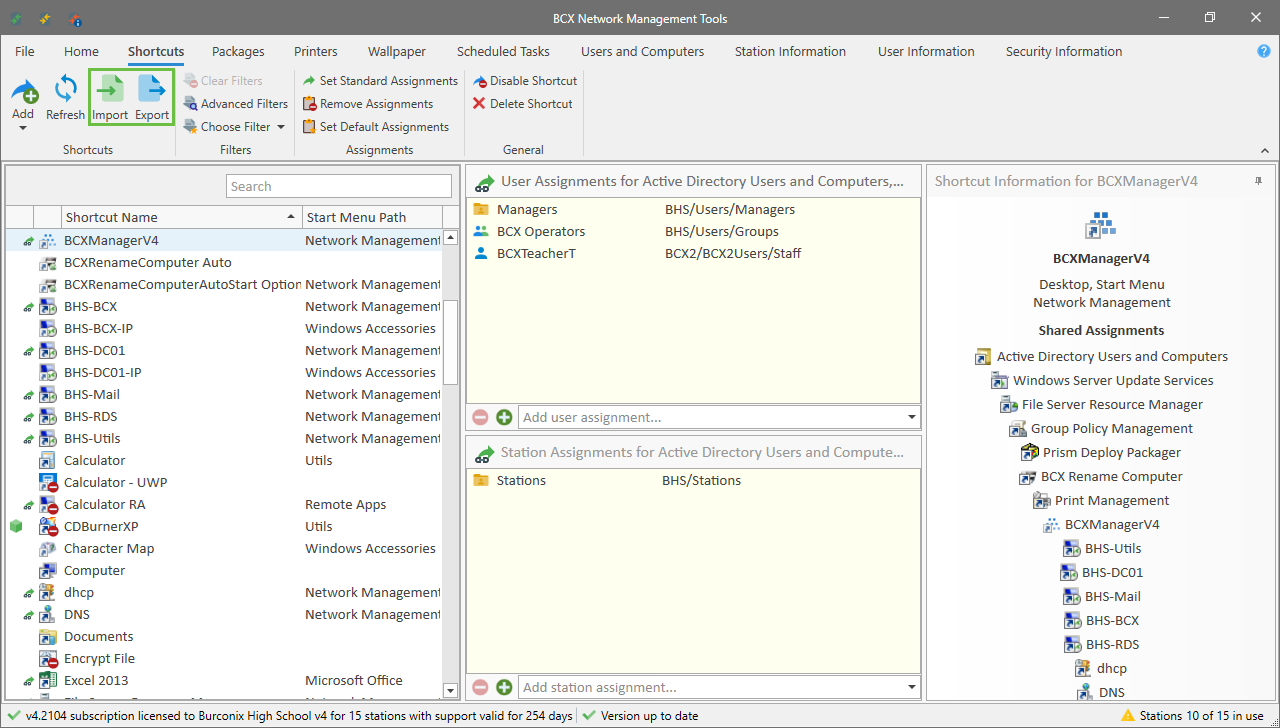
Shortcut Assignment
Shortcut assignments can be either Standard or Shared.
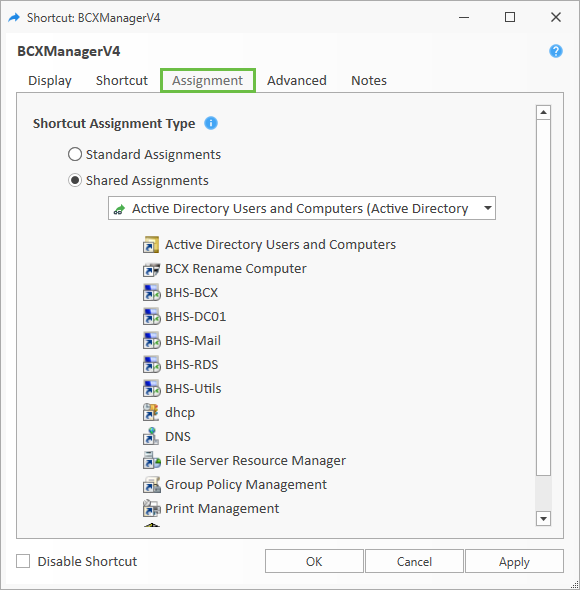
Standard have their own unique User and Station assignments, any changes to these will only have an effect on that single shortcut.
Shared belong to a group of shortcuts all sharing the same User and Station assignments, and a change to any one of those shortcuts is applied to all others in that group.
Selecting shared, enables a drop down list to select another shortcut with which to share assignments. (All shortcuts with shared assignments will be displayed on the tab)
Alternatively you can set the assignment type using the ribbon menu.
Advanced Options
The Advanced tab allows further customisation of how your shortcut can be deployed.
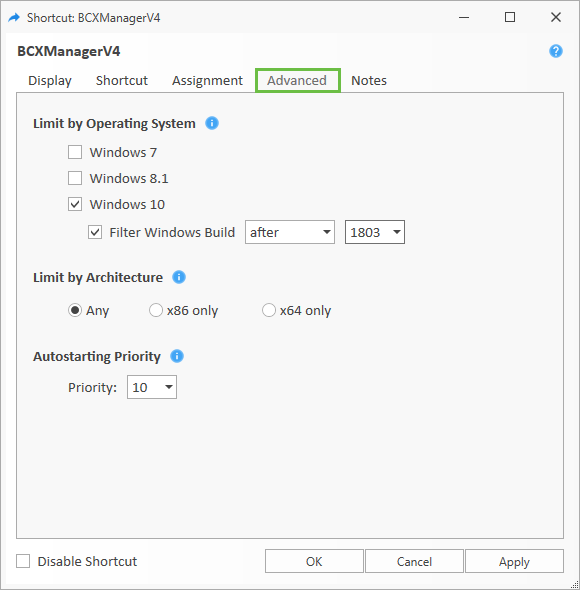
Limiting by Operating System allows you to not only to limit by the installed operating system, but with Windows 10 even further by build number.
Limiting by Architecture provides deployment choices from 32bit, 64bit or both.
Autostarting Priority determines the run order of any shortcuts set to start on logon. (A priority of 1 will run first).
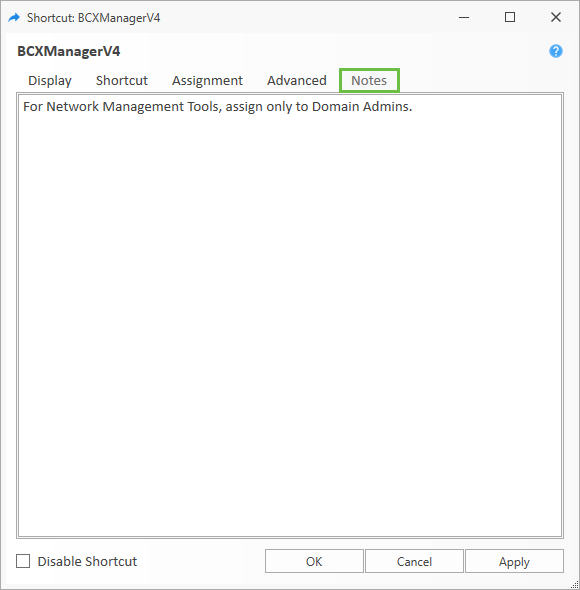
Notes
The "Notes" tab provides a free form text area for anything descriptive you wish to add.
Import and Export Shortcut Tasks
Especially useful if you are an academy with multiple BCX instances, you can standardise shortcuts across your schools by exporting and importing shortcuts from the ribbon menu.
Return to Contents page