Difference between revisions of "Deploy the windows agent on servers"
m |
|||
| Line 8: | Line 8: | ||
==Download the agent== | ==Download the agent== | ||
| − | Download the required .msi from [https:// | + | Download the required .msi from [https://cdn.zabbix.com/zabbix/binaries/stable/4.4/4.4.10/zabbix_agent-4.4.10-windows-amd64-openssl.msi here] |
==Windows agent installation== | ==Windows agent installation== | ||
Latest revision as of 10:33, 8 December 2020
Prerequisite
Verify you are able to ping bcxmonitor successfully. You may need to add .yourdomain.local if the host is not a domain member, or without a DNS suffix set (bcxmonitor.yourdomain.local). If this doesn't resolve you may need to use the static IP address of your bcxmonitor when installing the agent.
Download the agent
Download the required .msi from here
Windows agent installation
Run the .msi on each host, accept the license.
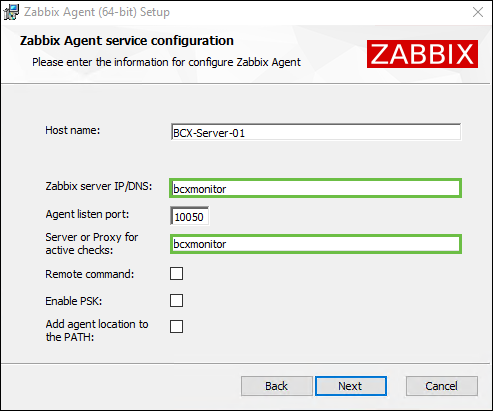
Leave the default host name and the default port as 10050. Add "bcxmonitor" to both the "zabbix server IP/DNS" and "server or proxy for active checks".

Continue, accepting the defaults and install.
Once installed, the discovery process may take up to an hour before the host is visible in your customer dashboard. Contact support if you are unable to see your servers an hour after successful agent installation.
Scripting installation
It is possible to install the agent from the command prompt using the following syntax
msiexec /i zabbix_agent-4.4.1-win-amd64-openssl.msi /qb SERVER=bcxmonitor SERVERACTIVE=bcxmonitor