Difference between revisions of "BCX Network Management Tools Installation Assistant"
m (→SQL) |
m (→Overview) |
||
| (24 intermediate revisions by 2 users not shown) | |||
| Line 2: | Line 2: | ||
Use the links below for details of installer steps during use of the Installation Assistant. | Use the links below for details of installer steps during use of the Installation Assistant. | ||
| − | === | + | ===Overview=== |
| − | + | BCX Network Management Tools Server setup should be installed on a Windows Server as part of your Active Directory Domain. | |
| + | We would recommend 8vCPUs and 8GB for a network with around 1000 stations. | ||
| + | The Installation Assistant will guide you through the process of Installing on your Windows Server, including configuring Group Policies to push out the BCX Client to stations. | ||
| − | + | We recommend adding a path exclusion in your AV solution for "C:\Program Files\BCX", as some products may falsely report/quarantine BCX components. | |
| − | |||
| − | |||
===Packages=== | ===Packages=== | ||
| Line 19: | Line 19: | ||
Below is an example of the security permissions set correctly on the folder. | Below is an example of the security permissions set correctly on the folder. | ||
| − | + | [[File:bcx installation security rights.png|link=]] | |
If you don't already have an existing central packages location, or want to start a new collection of software, the location can exist on the new BCX Management Server. | If you don't already have an existing central packages location, or want to start a new collection of software, the location can exist on the new BCX Management Server. | ||
| Line 41: | Line 41: | ||
This is something that should be carried out with the help of Burconix Support. | This is something that should be carried out with the help of Burconix Support. | ||
| − | + | [[File:bcx installation tools uandc.png|link=]] | |
===Wake on LAN=== | ===Wake on LAN=== | ||
| + | |||
| + | VLAN subnets can be added to the Server settings to allow Wake on LAN across the network. | ||
| + | |||
| + | BCX Uses Port 7 for WoL | ||
===DNS=== | ===DNS=== | ||
| Line 54: | Line 58: | ||
The Installation Assistant will create the record for you in the correct DNS Domain Name zone if you | The Installation Assistant will create the record for you in the correct DNS Domain Name zone if you | ||
would like it to, otherwise you can create the entry yourself as follows. | would like it to, otherwise you can create the entry yourself as follows. | ||
| − | |||
| − | |||
Open DNS management on a domain controller. Find the relevant DNS zone. | Open DNS management on a domain controller. Find the relevant DNS zone. | ||
Right click in an empty space in the right hand pane, and select New Alias (CNAME)... | Right click in an empty space in the right hand pane, and select New Alias (CNAME)... | ||
| − | |||
| − | |||
In the new record box, type an Alias Name of bcxmaster and click Browse. | In the new record box, type an Alias Name of bcxmaster and click Browse. | ||
| − | |||
| − | |||
Browse the DNS zone to find the server name of the server that the BCX Server Service will reside on. | Browse the DNS zone to find the server name of the server that the BCX Server Service will reside on. | ||
Press ok, and advance the Installation Assistant to check the record exists. | Press ok, and advance the Installation Assistant to check the record exists. | ||
| + | |||
| + | [[File:bcx installation dns entry.png|link=]] | ||
===SQL=== | ===SQL=== | ||
| Line 88: | Line 88: | ||
The SQL instance must have the Domain Admins group added to the security section of SQL server and database security mapping for the SYSTEM account. | The SQL instance must have the Domain Admins group added to the security section of SQL server and database security mapping for the SYSTEM account. | ||
This can be done by using the SQL Server Management Studio, expanding the Security section, right clicking Logins, and clicking New Login... | This can be done by using the SQL Server Management Studio, expanding the Security section, right clicking Logins, and clicking New Login... | ||
| − | |||
| − | |||
With the New Login box open, click Search. | With the New Login box open, click Search. | ||
Click Object Types... and click the Groups check box, press ok. Click Locations... and choose Entire Directory and press OK. | Click Object Types... and click the Groups check box, press ok. Click Locations... and choose Entire Directory and press OK. | ||
| − | + | [[File:bcx installation search ad.png|link=]] | |
Type Domain Admins in the bottom box and click Check Names. This should underline Domain Admins. Press OK. | Type Domain Admins in the bottom box and click Check Names. This should underline Domain Admins. Press OK. | ||
| Line 100: | Line 98: | ||
In the bottom section of the window, tick the boxes for the options db_datareader and db_datawriter. Press OK. | In the bottom section of the window, tick the boxes for the options db_datareader and db_datawriter. Press OK. | ||
| − | + | [[File:bcx installation domain admin properties.png|link=]] | |
Back in SQL Management, in the list of Logins, find the user NT AUTHORITY\SYSTEM. Right click and go to properties. | Back in SQL Management, in the list of Logins, find the user NT AUTHORITY\SYSTEM. Right click and go to properties. | ||
| − | + | [[File:bcx installation nt authority properties.png|link=]] | |
Go to User Mapping and in the bottom section of the window, tick the boxes for the options db_backupoperator, db_datareader, db_datawriter and db_ddladmin. | Go to User Mapping and in the bottom section of the window, tick the boxes for the options db_backupoperator, db_datareader, db_datawriter and db_ddladmin. | ||
| Line 114: | Line 112: | ||
===Update and Backup=== | ===Update and Backup=== | ||
| + | |||
| + | ====Automatic SQL Backup==== | ||
| + | |||
| + | The Burconix Management Tools have a backup feature that will export the SQL database to a local location. | ||
| + | This can either be done manually via the tool itself, or scheduled to backup nightly and retain a set number of backups. | ||
| + | Even with a large site the backup size is generally under 20MB. | ||
| + | |||
| + | The options for restarting services are best left as default. | ||
| + | We would advise that these are only changed when told to do so by Burconix Support. | ||
| + | |||
| + | [[File:bcx installation backup and restore.png|link=]] | ||
| + | |||
| + | ====Automatic BCX Update==== | ||
| + | |||
| + | Burconix Management Tools have an update feature, for customers with an active support contract, | ||
| + | that will update software over time with new features and functionality. These updates can be applied manually or automatically. | ||
| + | You can specify the time of day that the updates are applied. | ||
| + | By default this is 05:30am when we expect the network will be quiet. | ||
| + | |||
| + | Emails are sent out when an update is released so that you know when an update is due, and a 2nd email once the update is completed. | ||
| + | Updates take a minimal amount of time, and usually cause a few seconds of disruption while new files are copied. | ||
| + | |||
| + | |||
| + | [[File:bcx installation software updater.png|link=]] | ||
===Group Policy=== | ===Group Policy=== | ||
| + | For Burconix Management to work effectively there are a few additions to Group Policy that are needed. | ||
| + | One is a new policy to deploy the client service to managed workstations. This is done by deploying an MSI through the Group Policy Object. | ||
| + | The client service is a small installer and usually takes seconds to install. | ||
| + | |||
| + | The 2nd policy that is created removes Common Start Menu and Desktop items. | ||
| + | This means that end users only see what you want them to see in terms of shortcuts, and not all of the software that is available on the workstation. | ||
| + | |||
| + | The other part of this policy prevent the notification area clean up on the task bar. | ||
| + | This means that all icons are visible. This is important for the client service because aspects of it display information by using these icons. | ||
| + | [[File:bcx installation client install gpo.png|link=]] | ||
Return to [[BCX_Network_Management_Tools_Installation_Guide|'''Installation Guide''']] | Return to [[BCX_Network_Management_Tools_Installation_Guide|'''Installation Guide''']] | ||
Latest revision as of 13:18, 6 May 2022
Use the links below for details of installer steps during use of the Installation Assistant.
Contents
Overview
BCX Network Management Tools Server setup should be installed on a Windows Server as part of your Active Directory Domain. We would recommend 8vCPUs and 8GB for a network with around 1000 stations. The Installation Assistant will guide you through the process of Installing on your Windows Server, including configuring Group Policies to push out the BCX Client to stations.
We recommend adding a path exclusion in your AV solution for "C:\Program Files\BCX", as some products may falsely report/quarantine BCX components.
Packages
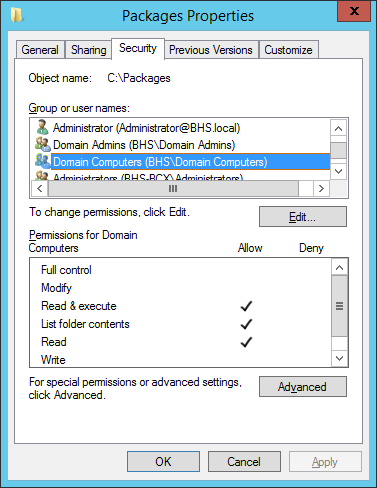
The client service runs under the context of the local computer SYSTEM account. When installing packages from a package task, the installer is ran within the same context as the client service. For this reason, when the computer authenticates itself against the shared package location, the computer account needs permission to access the shared location. When creating a new location this is done automatically, when using an existing location these options can be set manually or the Installation Assistant can attempt to change them for you. Below is an example of the security permissions set correctly on the folder.
If you don't already have an existing central packages location, or want to start a new collection of software, the location can exist on the new BCX Management Server. Otherwise use your existing location if you already deploy software in a similar fashion.
Active Directory
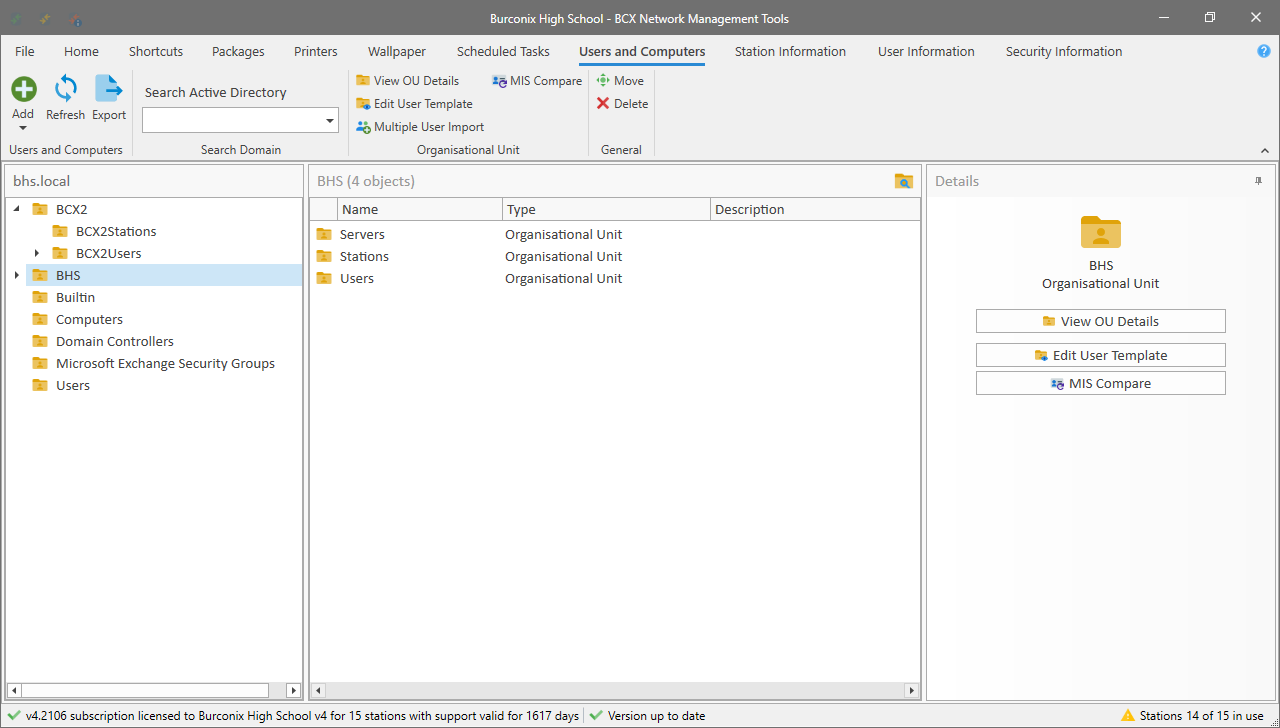
The server service requires information to be able to make a synced copy of data from Active Directory. The manager can see a live version of Active Directory Users and Computers from within the Users and Computers tab. Station Information and User Information that is stored is used to match client requests from workstations rather than querying Active Directory each time therefore causing substantial load on Domain Controllers and potential security issues from direct client access.
Because of the load that is put on the server service and the Domain Controller during the sync, the sync time by default it set to 30 minutes. This usually does not cause any problems with resource deployment, unless users are moved in short succession during testing. In which instance there is a manual sync option.
It is completely understandable that most people running a trial of the software will want to create a temporary OU structure to see the tools in use before committing it to your production network layout. The initial setup is flexible and the OU locations or names can be changed so it is possible to link it to an existing OU structure at a later date or migrate objects to the new structure. This is something that should be carried out with the help of Burconix Support.
Wake on LAN
VLAN subnets can be added to the Server settings to allow Wake on LAN across the network.
BCX Uses Port 7 for WoL
DNS
There is 1 DNS record that the management services require in order to work. The record is a CNAME for the BCX Management Server called BCXMaster. This is to enable flexibility within your environment so that users aren't forced to use the same server name and you can follow a specific naming convention. All client services use this DNS record to communicate with the server.
The Installation Assistant will create the record for you in the correct DNS Domain Name zone if you would like it to, otherwise you can create the entry yourself as follows.
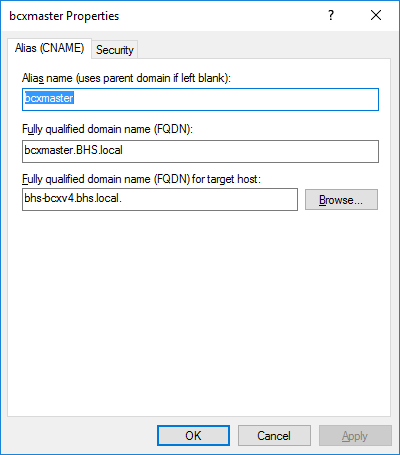
Open DNS management on a domain controller. Find the relevant DNS zone. Right click in an empty space in the right hand pane, and select New Alias (CNAME)...
In the new record box, type an Alias Name of bcxmaster and click Browse.
Browse the DNS zone to find the server name of the server that the BCX Server Service will reside on.
Press ok, and advance the Installation Assistant to check the record exists.
SQL
New SQL
The server service requires an SQL database to store all of it's information. This can either be an SQL Express instance for small sites and for testing or a full Standard or Enterprise installation. If you use an Express instance for testing this can later be upgraded to a full Standard or Enterprise edition. SQL Express downloads as a single executable file. This is the file that the Installation Assistant will need to install SQL. Using a Standard or Enterprise edition comes as an ISO image or on a DVD. The executable that the Installation Assistant uses is the setup.exe on the root of the disc.
You can set a custom instance name if required for any reason but otherwise the default BCXSQL is fine.
Existing SQL
If you choose to use an existing SQL instance we recommend using a dedicated instance, and there are some specific requirements needed for the server service to run. The SQL instance must have the Domain Admins group added to the security section of SQL server and database security mapping for the SYSTEM account. This can be done by using the SQL Server Management Studio, expanding the Security section, right clicking Logins, and clicking New Login...
With the New Login box open, click Search. Click Object Types... and click the Groups check box, press ok. Click Locations... and choose Entire Directory and press OK.
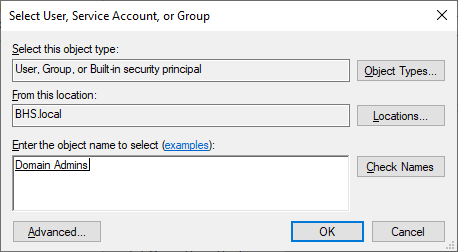
Type Domain Admins in the bottom box and click Check Names. This should underline Domain Admins. Press OK. Click User Mapping and put a tick in the tickbox next to bcxdb database. In the bottom section of the window, tick the boxes for the options db_datareader and db_datawriter. Press OK.
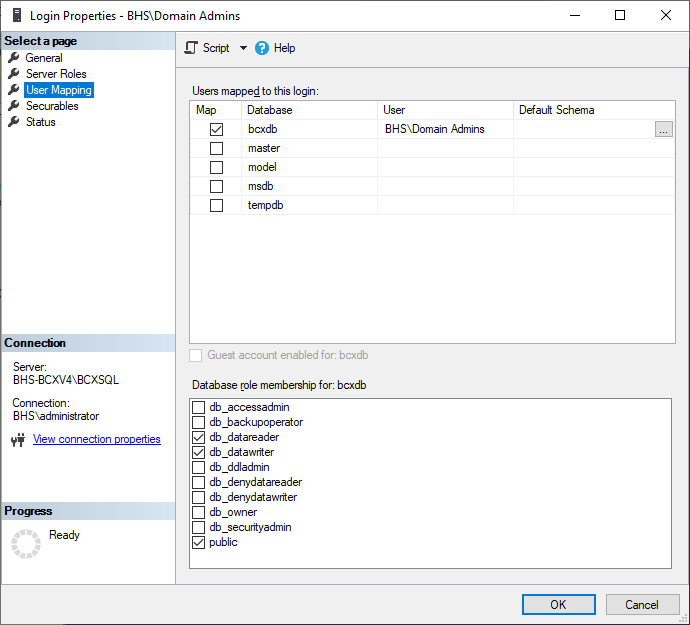
Back in SQL Management, in the list of Logins, find the user NT AUTHORITY\SYSTEM. Right click and go to properties.
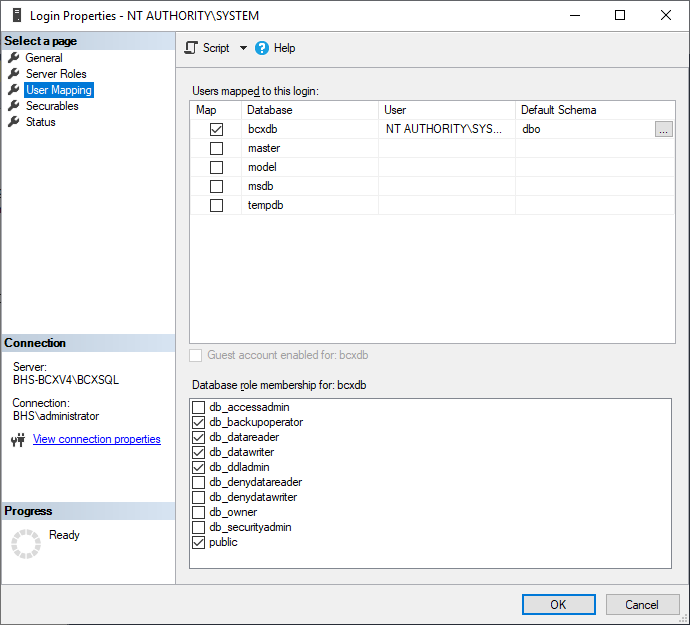
Go to User Mapping and in the bottom section of the window, tick the boxes for the options db_backupoperator, db_datareader, db_datawriter and db_ddladmin. Press OK.
This is to allow all Domain Admin users to access the manager, and the server service and backup utility to access the SQL database.
The username and password given during the installation must have access to be able to create the BCX database and restore the data from a file.
Update and Backup
Automatic SQL Backup
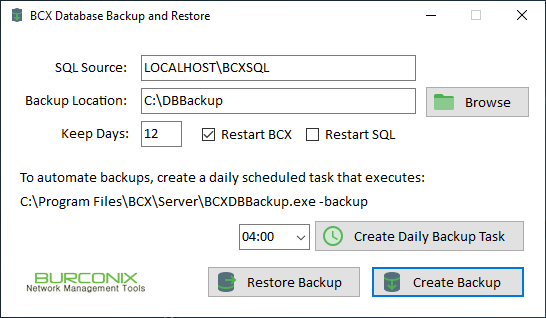
The Burconix Management Tools have a backup feature that will export the SQL database to a local location. This can either be done manually via the tool itself, or scheduled to backup nightly and retain a set number of backups. Even with a large site the backup size is generally under 20MB.
The options for restarting services are best left as default. We would advise that these are only changed when told to do so by Burconix Support.
Automatic BCX Update
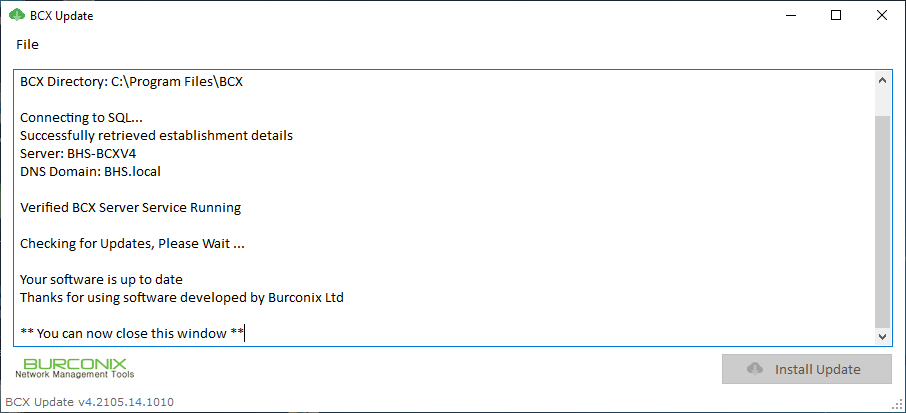
Burconix Management Tools have an update feature, for customers with an active support contract, that will update software over time with new features and functionality. These updates can be applied manually or automatically. You can specify the time of day that the updates are applied. By default this is 05:30am when we expect the network will be quiet.
Emails are sent out when an update is released so that you know when an update is due, and a 2nd email once the update is completed. Updates take a minimal amount of time, and usually cause a few seconds of disruption while new files are copied.
Group Policy
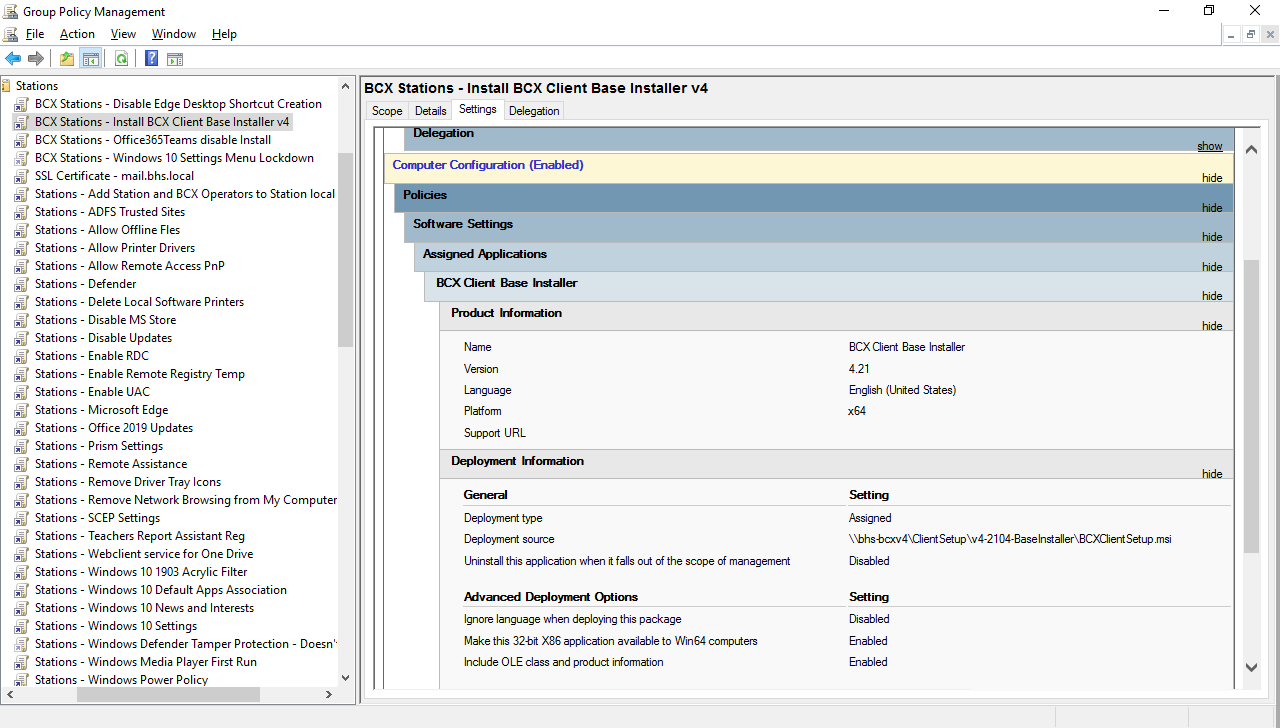
For Burconix Management to work effectively there are a few additions to Group Policy that are needed. One is a new policy to deploy the client service to managed workstations. This is done by deploying an MSI through the Group Policy Object. The client service is a small installer and usually takes seconds to install.
The 2nd policy that is created removes Common Start Menu and Desktop items. This means that end users only see what you want them to see in terms of shortcuts, and not all of the software that is available on the workstation.
The other part of this policy prevent the notification area clean up on the task bar. This means that all icons are visible. This is important for the client service because aspects of it display information by using these icons.
Return to Installation Guide